Installing a light fixture is a manageable DIY project requiring basic electrical skills and attention to detail. Always follow the manual for safety and efficiency.
Overview of the Installation Process
Installation begins with unpacking and verifying all components. Ensure the power supply is turned off before starting. Assemble the fixture according to the manual, then mount it securely. Connect the electrical wires carefully, following safety guidelines. Finally, test the fixture to ensure proper functionality. This structured approach ensures a safe and successful installation process for your new light fixture.
Importance of Following the Manual
Adhering to the manual ensures compliance with safety standards and prevents potential damage. It provides specific instructions tailored to the fixture, reducing risks of electrical shock or improper installation. Following guidelines helps maintain warranty validity and ensures optimal performance. Deviating from instructions can lead to hazards or malfunctions, emphasizing the manual’s crucial role in a successful and safe installation process for any light fixture.
General Safety Precautions
Always turn off the power supply at the circuit breaker before starting installation to avoid electrical shocks. Wear protective gear, including gloves and safety goggles, to prevent injury. Ensure the area is dry and free from water to avoid hazards. Properly ground the fixture to prevent electrical shock. Never attempt installation without following safety guidelines, as this can lead to serious injury or damage. Adhere to all precautions outlined in the manual for a safe process.
Pre-Installation Checks
Verify all components are included and undamaged. Check load capacity and compatibility with existing systems. Ensure the area is clear, power is off, and conditions are safe for installation.
Unpacking and Verifying Components
Begin by carefully unpacking the light fixture and ensuring all components are included. Check for any visible damage or missing parts. Verify the packaging contains the fixture, mounting hardware, wiring, and instructions. Compare the contents with the manual to confirm everything is accounted for. Handle fragile components, such as glass or bulbs, with care to avoid breakage. This step ensures a smooth installation process and prevents delays.
Checking Load Capacity and Compatibility
Before installation, verify the fixture’s load capacity to ensure it matches your electrical system. Check compatibility with existing wiring, switches, and dimmers. Ensure the fixture’s weight and power requirements align with the mounting surface and circuit capacity. Refer to the manual for specifications and guidelines to prevent overloading or electrical issues. Proper compatibility ensures safe and efficient operation of the light fixture.
Ensuring Power is Turned Off
Always switch off the power supply at the circuit breaker or fuse box before starting installation. Verify the power is off using a voltage tester to ensure safety. Never attempt installation without confirming the electricity is disconnected, as this poses serious electrical shock risks. Allow the fixture to cool down if it was recently in use. If unsure, consult a licensed electrician to avoid potential hazards.

Safety Guidelines for Installation
Always turn off power, use a voltage tester, and wear protective gear. Ensure the area is clear of water and flammable materials for a safe setup.
Protective Gear and Tools
Always wear protective gloves, safety glasses, and use non-conductive tools to prevent electrical shock. Ensure grounding for safety and use a voltage tester to confirm power is off. Keep the area clear of flammable materials and water. Use a ladder securely and maintain three points of contact. Refer to the manual for specific tool requirements, like screwdrivers or wire cutters, to handle wiring safely and efficiently during installation.
Grounding and Electrical Safety
Ensure proper grounding to prevent electrical shock and ensure reliable operation. Always use a voltage tester to confirm power is off before starting work. Avoid water contact with electrical components to prevent damage or hazards. Install safety wires securely to prevent fixture drop. Follow all local electrical codes and regulations for a safe installation. Grounding ensures your safety and protects the fixture from potential electrical surges or faults during operation.
Avoiding Damage to the Fixture
Handle the fixture with care to prevent scratches or breaks. Use gloves when touching glass or delicate components to avoid damage. Ensure all parts are assembled gently and securely. Avoid exposing the fixture to water or direct sunlight during installation. Properly secure the fixture to prevent drops or shifting. Follow the manufacturer’s guidelines for weight limits and mounting instructions to ensure stability and longevity of the fixture. This will help maintain its appearance and functionality over time.
Materials and Tools Required
Essential tools include screwdrivers, drills, and wire cutters. Required materials are mounting brackets, screws, dowels, and safety gloves. Ensure all components are included in the package.
Essential Tools for Installation
A screwdriver, drill, and wire cutters are indispensable for installation. Pliers, voltage testers, and ladders are also necessary. Gloves and safety glasses provide protection. Ensure all tools are readily available to streamline the process. These tools help in securely mounting, wiring, and testing the fixture efficiently. Always refer to the manual for specific requirements to avoid missing any critical equipment.
Recommended Materials for Mounting
Use high-quality screws, dowels, and mounting brackets for secure installation. Ensure screws are compatible with your ceiling or wall type. For added stability, consider using wall anchors or concrete screws for heavy fixtures. Adhesive strips or epoxy can reinforce mounting on smooth surfaces. Always check the fixture’s weight capacity and material requirements. Proper materials ensure a sturdy and durable installation, preventing future damage or hazards.
Wiring and Electrical Connections
When wiring, always turn off the power and test wires with a voltage tester. Use wire nuts for secure connections and ensure proper grounding for safety. Follow the manual for precise instructions.
Disconnecting the Old Fixture
Before disconnecting, ensure the power is turned off at the circuit breaker. Test the wires with a voltage tester to confirm they are safe to handle. Remove any screws or clips securing the old fixture. Gently pull the fixture away from the mounting bracket to access the wiring. Carefully disconnect the black, white, and copper wires from the old fixture. Set the old fixture aside for disposal or recycling. Always follow the manual for specific instructions.
Connecting the New Fixture
Attach the new fixture to the mounting bracket using the provided screws or clips. Connect the black wire to the black supply wire, the white wire to the white wire, and the copper wire to the grounding terminal. Use wire nuts to secure the connections. Ensure all wires are tightly connected and no loose ends remain. Double-check the manual for specific wiring instructions. Once connected, gently pull the wires to ensure they are secure and properly seated.
Ensuring Proper Wiring
Verify that all wires are correctly connected, with black wires linked to black supply wires and white wires to white wires. The copper grounding wire must be securely attached to the grounding terminal. Use wire nuts or connectors to ensure tight connections. Avoid cross-wiring or loose ends, which can cause electrical hazards. Double-check the wiring diagram in the manual for accuracy and safety. Proper wiring ensures the fixture operates safely and efficiently, preventing potential electrical issues or fire risks.

Mounting the Light Fixture
Secure the fixture using screws and dowels, ensuring stability on the ceiling or wall. Follow manual guidelines for proper alignment and tightening to prevent damage or instability.
Ceiling Mounting Instructions
To mount the light fixture on the ceiling, insert the fixture into the ceiling recess and thread the power cable through the provided opening. Secure the fixture using 5mm dowels and corresponding screws, ensuring tightness without over-tightening. Align the fixture evenly and double-check its stability. For added safety, install a security wire to prevent accidental detachment. Ensure all connections are secure before testing. Periodically inspect the mounting hardware to maintain safety and stability.
Wall Mounting Instructions
For wall mounting, guide the power cable through the fixture’s designated opening and secure the fixture using the provided oblong holes. Align the fixture with the wall bracket and fasten it tightly. Ensure the fixture is level and evenly positioned. Use appropriate screws to anchor the fixture firmly to the wall. Double-check all connections and ensure stability before operating. Regular inspections of the mounting hardware are recommended to maintain safety and prevent loosening over time.
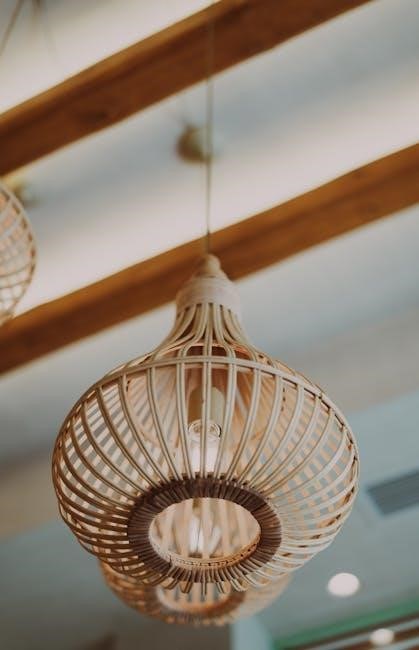
Pendant Light Mounting
Pendant light mounting involves threading the cable through the fixture and attaching it to the ceiling using 5mm dowels and screws. Adjust the height using the provided weights. Ensure the fixture is securely fastened to prevent swaying or dropping. After installation, check the fixture’s alignment and connection. Regularly inspect the mounting hardware and cable to ensure stability and safety. Proper installation ensures optimal performance and aesthetic appeal of the pendant light fixture.
Testing and Final Adjustments
Turn on the power and check for proper functionality. Ensure all lights illuminate evenly and no flickering occurs. Conduct a final safety inspection to verify secure connections and stability.
Turning On the Power
After completing the installation, restore power at the circuit breaker. Ensure all wire connections are secure and double-check for any loose ends. Use a voltage tester to confirm there’s no residual electricity. Once verified, switch the power back on and test the fixture to ensure proper illumination. Always refer to the manual for specific instructions, as different fixtures may have unique power requirements. Safety is paramount during this step.
Checking for Proper Functionality
After turning on the power, test the fixture thoroughly. Ensure all light sources illuminate evenly and switches function correctly. Verify dimming, color-changing, or other features work as intended. Check for flickering or unusual behavior, which may indicate wiring issues. If any component fails to perform, review connections or consult the manual. Proper functionality ensures safety, efficiency, and optimal performance of the light fixture.
Final Safety Inspections
Inspect the fixture for any visible damage or loose connections. Ensure all mounting hardware is secure and tightened properly. Verify that electrical connections are safe and meet local regulations. Check for proper grounding to prevent electrical hazards. Look for any signs of wear or damage to wires or components. Ensure the fixture operates without flickering or unusual behavior. Confirm all safety measures are in place before finalizing the installation.

Maintenance and Troubleshooting
Regularly inspect and clean the fixture to maintain efficiency. Check for loose connections and replace worn-out parts promptly. Address flickering or dimming by ensuring proper bulb installation and connection. Consult a professional for complex electrical issues to ensure safety and longevity of the fixture.
Regular Maintenance Tips
Regular maintenance ensures optimal performance and longevity of your light fixture. Clean the fixture with a soft cloth to remove dust and dirt, which can reduce light output. Inspect electrical connections for tightness and signs of wear. Replace bulbs as needed, using the correct wattage specified in the manual. Ensure all screws and mounting hardware are secure to prevent wobbling or instability. Schedule annual checks by a qualified electrician for complex fixtures. Address any issues promptly to avoid potential hazards. Always turn off the power before performing any maintenance tasks. Regular upkeep helps maintain both functionality and safety, ensuring your fixture operates efficiently for years.
Common Issues and Solutions
Common issues with light fixtures include flickering, dimming, or complete loss of light. Check for loose connections or faulty wiring and tighten screws. Ensure the correct bulb wattage is used, as specified in the manual. If the fixture drops slightly after installation, adjust the mounting hardware. For water-resistant fixtures, inspect for leaks or condensation. Address damage from external light beams by repositioning nearby light sources. Regularly inspect for wear or corrosion and replace damaged parts promptly. Always refer to the manual for troubleshooting specific to your fixture model. Proper installation and regular checks can prevent most issues, ensuring safe and reliable operation.
Proper installation ensures safety, efficiency, and optimal performance of your light fixture. Always follow the manual and take necessary precautions for a successful and long-lasting result.
Final Thoughts on Installation
Completing a light fixture installation is rewarding, but remember, accuracy and adherence to instructions are key. Double-check all connections, ensure stability, and test functionality before finalizing. Proper installation not only enhances safety but also ensures the fixture performs optimally for years. Always refer back to the manual if doubts arise and consider professional help if unsure about any step. A well-installed fixture improves both aesthetics and functionality in any space.
Importance of Proper Installation
Proper installation is crucial for safety, functionality, and longevity of the light fixture. It ensures electrical connections are secure, preventing hazards like shocks or fires. A well-installed fixture also maintains its aesthetic appeal and performance. Incorrect installation can void warranties or lead to premature wear. Always follow the manual and consider professional assistance if needed to guarantee reliability and compliance with safety standards. Proper installation is an investment in both safety and efficiency for years to come.